Installing a new air conditioning system is a big decision for your home. You want to make sure the job gets done right the first time. Professional AC installation typically takes 4-8 hours for a standard home system and involves careful planning, proper sizing, electrical work, and safety testing to ensure your unit runs efficiently for years to come.
The installation process affects how well your AC performs and how long it lasts. A trained technician will assess your home, select the right equipment size, handle refrigerant safely, and make sure everything meets local codes. These steps protect your investment and help you avoid costly repairs down the road.
This guide walks you through what professional installation includes and why it matters. Here’s what you need to know:
- Why hiring experts for AC installation impacts performance
- Overview of common AC systems
- Step-by-step guide to the professional installation process
- Key factors affecting installation pricing
- Best practices for post-installation AC care
Keep reading to learn what separates a professional installation from a rushed one, what different AC systems cost and require, and how to protect your new unit for the long haul.
Why hiring experts for AC installation impacts performance
Professional installation directly affects how well your AC unit cools your home and how much energy it uses. Expert installers use specific techniques that prevent common problems and help your system run at its best capacity.
Accurate sizing for optimal cooling
Getting the right size AC unit for your home requires detailed calculations that professionals perform during installation. A unit that’s too small will run constantly without cooling your home properly. A unit that’s too large will cycle on and off too frequently, which wastes energy and causes extra wear on components.
Professional installers measure your home’s square footage, ceiling height, insulation quality, and window placement. They also account for local climate conditions and how many people live in your home. These calculations ensure your AC unit matches your actual cooling needs.
According to the U.S. Department of Energy, oversizing HVAC equipment leads to reduced efficiency, increased wear, and elevated indoor humidity during summer months, yet the problem remains widespread because many installations skip sophisticated load calculations. When experts size your system correctly, you get consistent cooling throughout your home without wasting energy.
Incorrect sizing leads to measurable problems:
- 20-40% reduction in system efficiency
- Higher monthly energy bills
- Uneven temperatures between rooms
- Increased humidity levels indoors
Installation best practices to minimize energy loss
The way installers set up your AC components determines how efficiently the system operates from day one. Proper duct sealing prevents cooled air from escaping into walls or attics before it reaches your living spaces. Professional installers also calibrate refrigerant levels precisely, which directly impacts cooling power and energy consumption.
Experts follow manufacturer specifications and local building codes during every step. They position outdoor units in locations that allow proper airflow and drainage. They secure all electrical connections to prevent power loss and safety hazards.
The installation process includes testing each component under operating conditions. This reveals any issues before they affect your daily comfort or create expensive repair needs.
Promoting long-term system reliability and safety
Professional installation protects your investment by ensuring all parts work together safely and efficiently. Installers with specialized training handle refrigerant properly, which prevents leaks that damage the environment and reduce cooling capacity. They also verify that electrical systems can handle your unit’s power requirements without creating fire risks.
Expert setup includes warranty protection that DIY installations typically void. Most manufacturers require professional installation to honor their coverage. This means you’re protected if components fail during the warranty period.
Proper installation extends your system’s lifespan by reducing stress on mechanical parts. Units that receive professional setup typically last 15-20 years with regular maintenance, compared to significantly shorter lifespans for improperly installed systems.
Overview of common AC systems
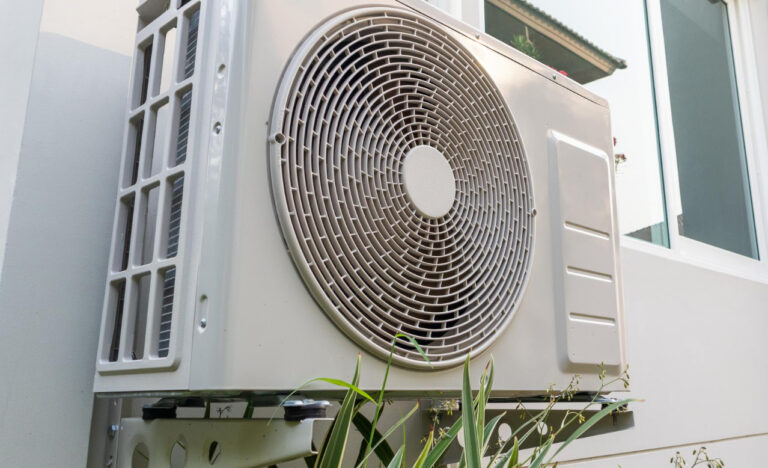
Modern AC systems come in three main types, each designed for different home layouts and cooling needs. Central air works through ductwork to cool entire homes, ductless mini-splits provide targeted cooling without ducts, and heat pumps offer both heating and cooling functions with improved energy efficiency.
Central air conditioning for complete home coverage
Central air conditioning uses a network of ducts to distribute cool air throughout your entire home. The system includes an outdoor condenser unit and an indoor evaporator coil that connects to your ductwork. This setup delivers consistent temperatures across all rooms.
Your home needs existing ductwork or the space to install it for central air to work properly. The system works best for larger homes where you want to cool multiple rooms at once. A central thermostat controls the temperature for your whole house.
Central air systems typically last 15 to 20 years with regular maintenance. They operate quietly since the main compressor sits outside your home. These units work well if you already have forced-air heating, as they can share the same duct system.
Ductless mini-split options for adaptable spaces
Ductless mini-split systems include an outdoor compressor connected to one or more indoor air-handling units. Thin refrigerant lines run through a small hole in your wall to link the indoor and outdoor components. Each indoor unit cools a specific room or zone.
You can control each indoor unit separately, which lets different rooms stay at different temperatures. This makes mini-splits ideal for home additions, older homes without ductwork, or spaces where extending ducts isn’t practical.
Installation takes less time than central air because you don’t need ductwork. The indoor units mount high on walls or hang from ceilings. Mini-splits use less energy than central air when you only need to cool certain areas of your home.
Heat pump solutions for enhanced energy efficiency
Heat pumps move heat rather than generate it, which uses less energy than traditional AC systems. In summer, they remove heat from your home like a standard air conditioner. In winter, they reverse the process to bring warmth inside.
Two main types exist: air-source heat pumps that extract heat from outdoor air, and ground-source (geothermal) heat pumps that use stable underground temperatures. Air-source models work like central air systems with ductwork, while ductless versions function as mini-splits.
Heat pumps work best in moderate climates where winter temperatures don’t drop too low. They can reduce your energy bills by 30 to 40 percent compared to electric heating. Modern heat pumps include backup heating elements for extremely cold days.
Step-by-step guide to the professional installation process
Professional HVAC system installation follows a structured approach that starts with evaluating your home’s specific cooling needs and ends with a fully operational system. Technicians complete multiple tasks at each stage to ensure your new AC unit setup performs efficiently and reliably.
Conducting a home assessment and load analysis
The first step in any air conditioner installation services project involves a detailed evaluation of your home. A technician measures each room and examines your insulation, windows, ceiling height, and overall square footage. They also check the ductwork for leaks, damage, or inadequate sizing that could reduce efficiency.
This process includes a load calculation to determine the right system size for your space. The calculation factors in your local climate, sun exposure, number of occupants, and heat-generating appliances. A system that’s too small won’t cool your home properly, while an oversized unit cycles on and off too frequently.
The technician reviews your electrical panel to confirm it can handle the new system’s power requirements. They identify the best location for indoor and outdoor components based on accessibility, drainage, and clearance requirements. This assessment typically takes 1-2 hours and helps prevent costly mistakes that could affect your comfort or increase energy bills.
Removing outdated units and preparing the area
Before installing new equipment, technicians safely remove your old system. They disconnect electrical connections and carefully recover refrigerant according to EPA regulations. The old indoor and outdoor units are uninstalled and removed from your property.
Workers clean the installation area and make any necessary repairs to mounting pads, wall openings, or support structures. They may need to modify existing ductwork or create new openings for refrigerant lines and drainage. Electrical work includes installing a new disconnect box, updating wiring, and ensuring proper circuit breaker capacity.
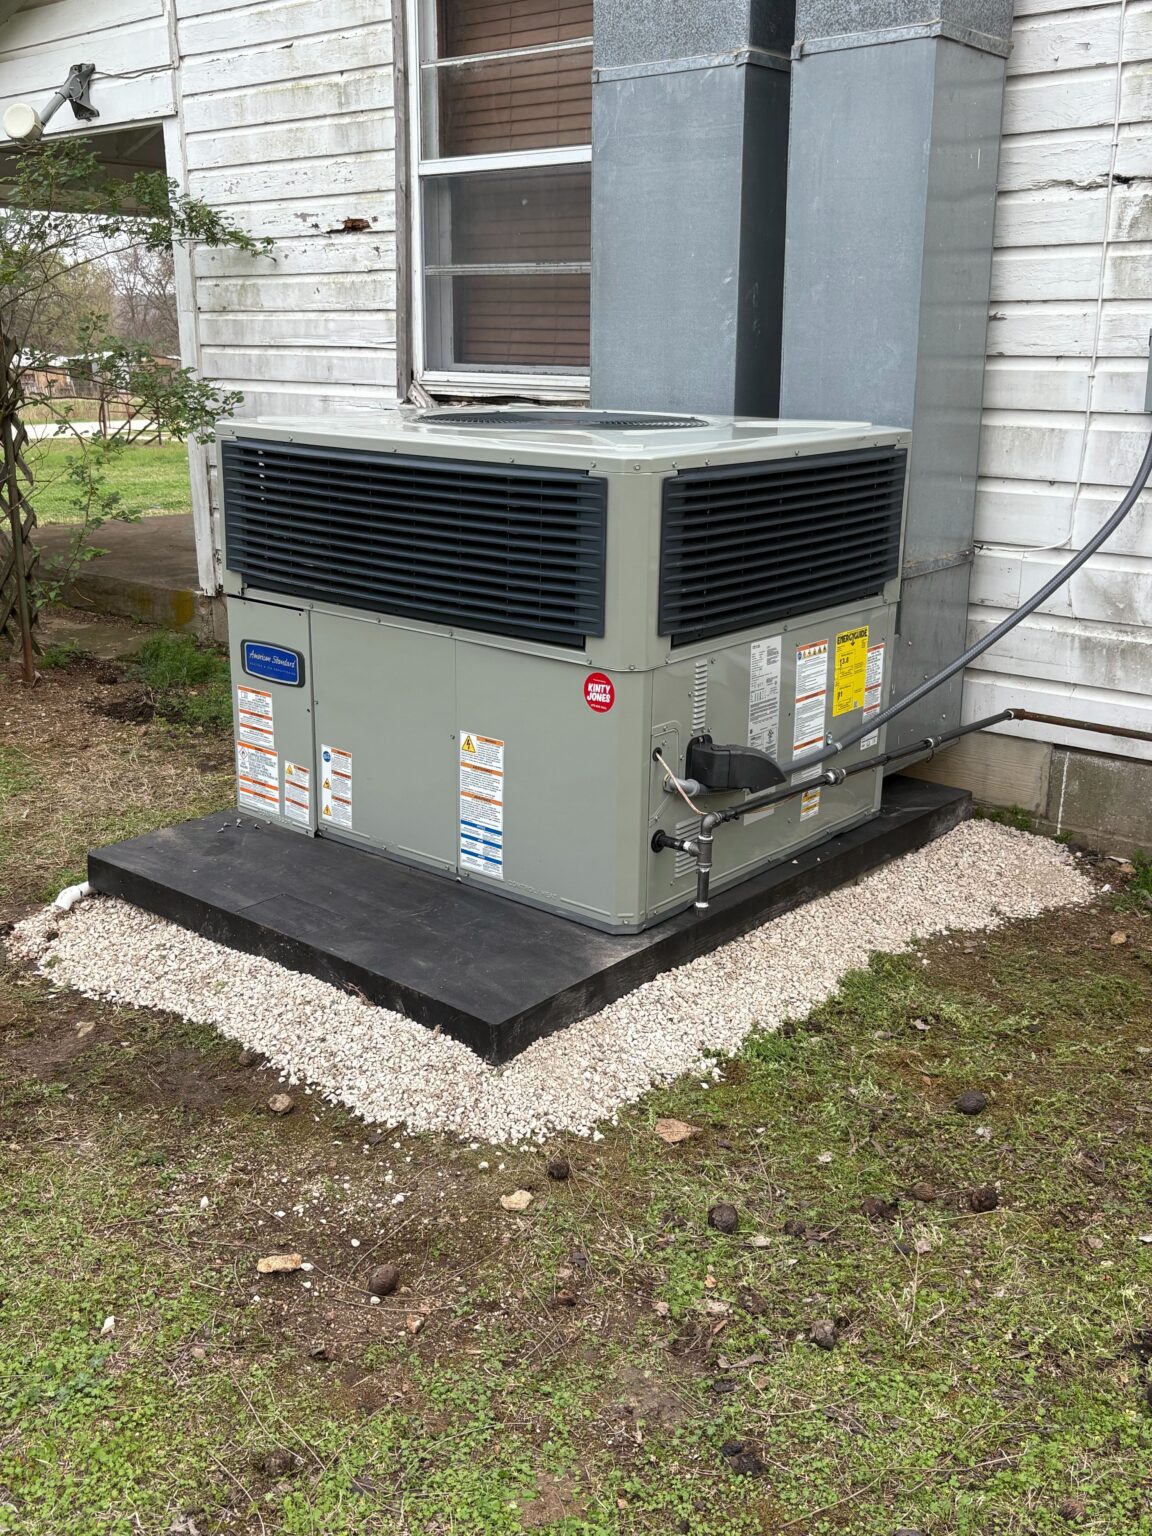
The preparation phase also involves positioning the outdoor condenser on a level pad with adequate clearance from walls, plants, and other obstructions. Inside, technicians prepare the location for the air handler or furnace, ensuring proper support and access for future maintenance.
System installation, testing, and calibration
Technicians mount the outdoor condenser unit and connect it to the indoor components using refrigerant lines. They install or connect the air handler, securing all mounting brackets and verifying proper alignment. Electrical connections are completed between the thermostat, indoor unit, outdoor unit, and power source.
The team runs refrigerant lines through walls, sealing all penetrations to prevent air leaks and moisture intrusion. They connect drain lines with proper slope and test for blockages. All ductwork connections are sealed and insulated to maximize efficiency.
Once the home cooling system installation is complete, technicians charge the system with the correct amount of refrigerant. They measure airflow, temperature differentials, and pressure levels to verify performance. The thermostat is programmed and calibrated to maintain accurate temperature control.
Final testing includes:
- Checking all electrical connections for proper voltage and amperage
- Verifying refrigerant pressures match manufacturer specifications
- Testing safety controls and emergency shutoffs
- Running the system through multiple cooling cycles
- Measuring supply and return air temperatures
The technician walks you through basic operation and maintenance requirements before leaving your property with a fully functional system.
Key factors affecting installation pricing
Several elements determine what you’ll pay for a professional AC installation. Equipment specifications, existing infrastructure, and the complexity of the work all play significant roles in your final cost.
AC unit capacity and efficiency ratings
The size and efficiency of your AC unit directly impact central AC installation cost. A properly sized system matches your home’s square footage and cooling needs. Units are measured in tons, with most homes requiring between 1.5 to 5 tons of cooling capacity.
Common residential AC sizes:
- 1,000-1,500 sq ft: 1.5-2 tons
- 1,500-2,000 sq ft: 2-3 tons
- 2,000-2,500 sq ft: 3-4 tons
- 2,500+ sq ft: 4-5 tons
SEER ratings measure energy efficiency, ranging from 14 to 25+ for modern units. Higher SEER models cost more upfront but reduce monthly energy bills. A 16 SEER system typically costs $1,000-$2,000 more than a 14 SEER model, while 20+ SEER units can add $3,000-$5,000 to equipment costs.
According to the U.S. Department of Energy, ENERGY STAR certified central air conditioners are roughly 15% more efficient than standard models, and newer systems carry SEER ratings as high as 26, making the efficiency gap between older and newer units significant. High-efficiency units also require specialized installation work, including longer refrigerant lines, upgraded electrical components, and additional time calibrating the system.
Evaluating and upgrading ductwork
Your existing ductwork significantly affects installation costs. Homes with functional ducts in good condition require minimal additional work. Older systems often need repairs, sealing, or complete replacement.
Ductwork costs by scope:
- Sealing and minor repairs: $300-$1,000
- Partial duct replacement: $1,500-$3,500
- Complete new ductwork: $3,000-$7,500
Contractors inspect ducts for leaks, proper sizing, and adequate insulation. Undersized or leaking ducts reduce system efficiency by 20-40%. Homes without existing ductwork face the highest costs, as new installations require cutting access points, running ducts through walls or ceilings, and installing registers throughout your home.
Labor scope and project timing
Installation complexity determines labor hours and crew size needed. A straightforward replacement on an existing pad with compatible connections takes 4-8 hours. New installations or challenging locations require 8-16 hours or multiple days.
Labor rates vary by region and season. Most contractors charge $75-$150 per hour, with total labor costs ranging from $1,500-$4,000 for standard installations. Spring and early summer bring higher prices due to peak demand, while fall and winter installations often come with 10-20% discounts.
Projects requiring electrical panel upgrades, concrete pad installation, or roof penetrations add $500-$2,500 in specialized labor. Building permits typically cost $50-$300 depending on your local requirements.
Best practices for post-installation AC care
Taking care of your AC system after installation protects your investment and keeps your home comfortable. Regular filter changes, professional maintenance visits, and attention to warning signs help your unit run efficiently for 10-15 years or more.
Scheduling routine maintenance and inspections
You should schedule professional AC maintenance twice per year. The best times are spring before cooling season starts and fall after heavy use ends.
During these visits, a technician will inspect electrical connections, measure refrigerant levels, and test system controls. They’ll also clean coils, check the condensate drain, and verify proper airflow throughout your system.
Annual maintenance costs between $75-200 but prevents expensive repairs down the road. Most HVAC companies offer maintenance plans that include priority service and discounts on parts.
You can also perform monthly checks on your own. Look at the outdoor unit to make sure nothing blocks airflow. Listen for unusual sounds when the system runs. Check that cool air flows evenly from all vents in your home.
Keep records of all maintenance visits and repairs. This documentation helps if warranty issues arise and shows potential buyers you maintained the system properly.
Maintaining filter cleanliness and unit hygiene
Your air filter needs replacing every 1-3 months depending on use and household conditions. Homes with pets, smokers, or high dust levels require monthly changes.
A dirty filter forces your AC to work harder, which increases energy bills by up to 15%. It also reduces airflow and can cause the evaporator coil to freeze.
Replace filters with the same size and MERV rating recommended by your installer. Higher MERV ratings capture more particles but may restrict airflow if your system isn’t designed for them.
Keep the area around your outdoor unit clear. Remove leaves, grass clippings, and debris within two feet of the unit. Trim bushes and plants back at least 12 inches on all sides.
Clean the outdoor unit’s fins gently with a garden hose once per season. Spray from inside out to push debris away from the coils. Never use a pressure washer as it can bend the delicate fins.
Identifying warning signs of performance decline
Reduced cooling performance is often the first sign of problems. If some rooms stay warm or the system runs constantly without reaching the set temperature, contact a technician.
Unusual noises indicate mechanical issues. Grinding suggests motor bearing problems. Squealing often means a worn belt. Banging or clanking can signal loose or broken internal components.
Watch for these additional warning signs:
- Water leaks around the indoor unit
- Ice buildup on refrigerant lines
- Moisture or mold near vents
- Frequent system cycling on and off
- Weak airflow from vents
- Sudden increases in energy bills
Strange smells require immediate attention. A burning odor suggests electrical problems or overheating components. Musty smells indicate mold growth in the ductwork or unit.
Address problems quickly when you notice them. Small issues become expensive repairs if ignored. Most AC manufacturers require timely repairs to keep warranties valid. If your system fails unexpectedly, emergency AC service is available when you need a fast response.
Conclusion
Installing a new AC unit requires careful planning and skilled work. Each step matters, from choosing the right size system to connecting electrical components and testing performance. You need a trained technician to handle these tasks correctly.
A proper installation protects your investment. Your system will cool your home efficiently and last longer when professionals set it up right. Poor installation leads to higher energy bills, frequent repairs, and early system failure.
Key benefits of professional installation include:
- Accurate sizing based on your home’s specific needs
- Proper refrigerant line connections and sealing
- Correct electrical wiring and safety measures
- Thorough testing before the job is complete
- Warranty protection for your equipment
Your comfort depends on more than just buying a quality AC unit. The installation process determines how well your system performs for years to come. Professionals have the tools and training to handle complex tasks like ductwork evaluation, load calculations, and system calibration.
You should expect clear communication throughout the process. Good installers explain what they’re doing and teach you how to maintain your new system. They answer your questions and make sure everything works correctly before they leave.
Professional installation gives you peace of mind. You know your system is safe, efficient, and ready to keep your home comfortable. Contact Kinty Jones to schedule your professional AC unit installation and get it done right the first time.