A condenser coil leak can turn your perfectly cool home into an uncomfortable space fast. When refrigerant escapes through small holes or cracks in the coil, your air conditioner loses its ability to cool properly. You might notice warm air blowing from your vents or hear your system running constantly without results.
While some condenser coil leaks can be repaired temporarily, the fix often depends on the location and size of the leak, and many experts recommend replacement for a long-term solution. Small leaks can sometimes be patched through brazing or sealants, but multiple leaks or severe damage usually mean the coil has reached the end of its life. The repair versus replace decision comes down to the age of your system, the extent of damage, and cost.
Here’s what this guide covers:
- What a condenser coil does in HVAC systems
- Common causes of condenser coil leaks
- Warning signs of a coil leak
- Professional leak repair approaches
- Preventing future coil issues
Keep reading to learn what causes these leaks, how to recognize the warning signs, and what steps professionals take to fix them.
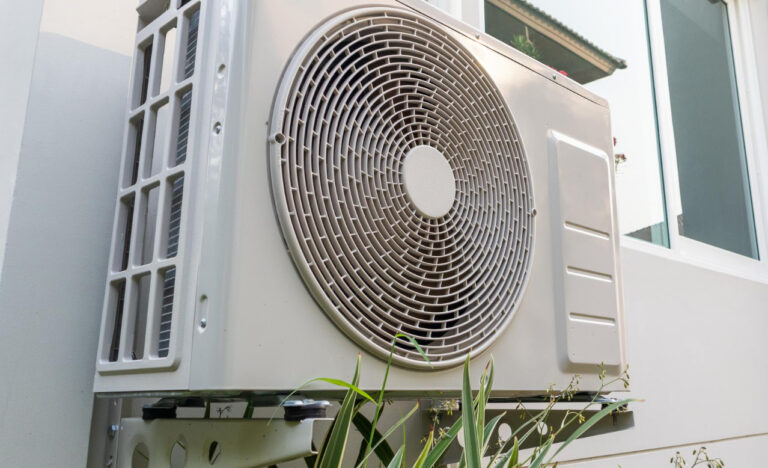
What a condenser coil does in HVAC systems
The condenser coil releases heat from your home into the outside air, which allows the refrigerant to change from a hot gas back into a liquid. This heat transfer process keeps your air conditioning system running properly and maintains comfortable temperatures indoors.
Role of heat transfer in cooling performance
The condenser coil removes heat that was absorbed from inside your home. When the refrigerant arrives at the condenser coil, it carries all the heat it picked up from your indoor air. A fan blows outdoor air across the coil’s metal fins, which pulls the heat away from the refrigerant.
This cooling process causes the refrigerant to change states. It transforms from a high-pressure, high-temperature gas into a cooler liquid. Without this heat transfer, the refrigerant cannot return to the evaporator coil to absorb more heat from your home.
The efficiency of this heat exchange directly affects your system’s cooling power. Clean coils with good airflow transfer heat faster and more completely. Dirty or damaged coils struggle to release heat, which makes your AC work harder and cool less effectively.
Why condenser coils are essential for efficiency
Your condenser coil determines how well your HVAC system uses energy. When the coil releases heat efficiently, the refrigerant cools down properly and requires less energy to complete the cooling cycle. This reduces your electricity bills and prevents unnecessary wear on your system.
A properly functioning condenser coil also extends your air conditioner’s lifespan. The compressor doesn’t have to work as hard when the coil transfers heat effectively. Reduced strain on the compressor means fewer breakdowns and lower repair costs over time.
Key efficiency factors include:
- Clean coil surfaces free from dirt and debris
- Adequate airflow around the outdoor unit
- Proper refrigerant levels in the system
- Intact coil fins that aren’t bent or damaged
How refrigerant flows through the coil system
The refrigerant starts its journey at the evaporator coil inside your home, where it absorbs heat and becomes a hot gas. The compressor then pressurizes this gas and pushes it to the outdoor condenser coil through refrigerant lines.
Inside the condenser coil, the refrigerant travels through a series of tubes or coils. As outdoor air flows over these tubes, the refrigerant releases its heat and begins to condense. The refrigerant exits the condenser as a high-pressure liquid.
This liquid refrigerant then flows through an expansion valve, which reduces its pressure and temperature. It returns to the evaporator coil to absorb more heat from your indoor air, and the cycle repeats continuously until your home reaches the desired temperature.
Common causes of condenser coil leaks
Condenser coil leaks typically happen due to metal breakdown from weather exposure, direct physical damage, or the natural wear that comes with years of use. Understanding these causes helps you spot problems early and protect your AC system.
Corrosion from weather exposure and moisture
Your condenser coil sits outside and faces rain, humidity, and temperature changes every day. These conditions cause the metal to corrode over time.
The coil’s metal reacts with moisture in the air and creates rust or corrosion. This process eats away at the metal and forms small holes or cracks. Once these openings appear, refrigerant escapes from the system.
Coastal areas present extra risk because salt in the air speeds up corrosion. Even inland units face damage from acid rain or chemicals in the environment. The protective coating on coils wears down over the years, which leaves the metal exposed to these damaging elements.
Physical damage from debris or impact
Objects hitting your outdoor unit can puncture or bend the coils and cause immediate leaks. Common sources of damage include:
- Lawn equipment like weed trimmers and mowers that throw rocks or sticks
- Falling branches during storms or high winds
- Hail that dents or punctures the thin metal fins
- Tools dropped during maintenance or repair work
Mishandling the equipment during installation or service also causes coil damage. Even small dents can create weak points in the metal that develop into leaks later. The coils are delicate, and careless contact with hard objects compromises their structure.
Aging components and metal fatigue
Air conditioner coils wear out as they age. The metal expands and contracts with temperature changes every time your system runs.
This constant expansion and contraction creates stress on the metal. After years of this cycle, the material becomes brittle and develops tiny cracks. These cracks grow larger until refrigerant leaks out.
Most condenser coils last 10 to 15 years before metal fatigue becomes a serious concern. Older systems show more signs of wear because the metal has gone through millions of heating and cooling cycles. The joints and welds on the coils are especially vulnerable to this type of failure.
Warning signs of a coil leak
A condenser coil leak disrupts your AC system’s ability to cool your home effectively. The leak causes refrigerant to escape, which leads to several noticeable problems that get worse over time.
Reduced cooling performance and warm air output
Your air conditioner blows warm or lukewarm air when the condenser coil leaks refrigerant. The refrigerant carries heat away from your home, so when levels drop, your system cannot remove heat properly.
You might notice rooms stay warmer than your thermostat setting. The temperature difference between your desired setting and actual room temperature grows larger as more refrigerant escapes.
Your AC runs longer cycles to reach the set temperature but never quite gets there. This constant running happens because the system tries to compensate for lost cooling power. In severe cases, your outdoor AC unit leaking refrigerant will cause the system to stop cooling entirely.
Common cooling problems include:
- Air from vents feels room temperature instead of cold
- Some rooms cool while others stay warm
- Temperature fluctuates throughout the day
- System runs continuously without reaching the set point
Hissing sounds or refrigerant leakage signs
A hissing noise from your outdoor unit indicates refrigerant escaping through a hole or crack in the coil. The sound resembles air leaking from a tire and gets louder when you stand near the condenser.
You might see an oily residue around the coil or refrigerant lines. This residue appears as a dark, greasy substance that accumulates near the leak point.
Small leaks produce subtle sounds that are hard to hear during the day. Check your system at night when background noise is lower. Larger leaks create obvious hissing or bubbling sounds you can hear from several feet away.
HVAC technicians use specialized leak detection tools to find small leaks. These tools include electronic leak detectors and ultraviolet dye that glows under black light.
Rising energy bills without increased usage
Your electricity costs increase when your condenser coil leaks. The system works harder and runs longer to maintain comfortable temperatures, which uses more power.
According to the U.S. Department of Energy, neglecting necessary maintenance causes a steady decline in air conditioning performance while energy use steadily increases, and a dirty or compromised coil directly reduces the system’s ability to absorb and release heat. Compare your current bills to the same months from previous years. An unexplained increase of 15-25% often points to AC efficiency problems.
The compressor runs almost constantly to compensate for poor cooling. This extended runtime directly translates to higher energy consumption. You pay more while getting less comfort from your system.
Track your monthly usage in kilowatt-hours, not just dollar amounts. This removes price fluctuations and shows actual energy consumption patterns.
Ice buildup on the outdoor unit
Ice or frost on your condenser coil signals a refrigerant leak or other serious problem. The ice appears on the copper lines, coil fins, or around the outdoor unit’s exterior.
Low refrigerant levels cause pressure imbalances that make parts of your system get too cold. The moisture in the air freezes on these super-cooled surfaces. You might also see ice on the larger refrigerant line leading into your house.
Where ice typically forms:
- Copper refrigerant lines
- Condenser coil fins
- Connections between components
- Service valves
The ice prevents proper heat exchange and further reduces cooling capacity. Your system may shut down completely to prevent compressor damage. Never chip away ice yourself, as this can damage delicate coil fins.
Professional leak repair approaches
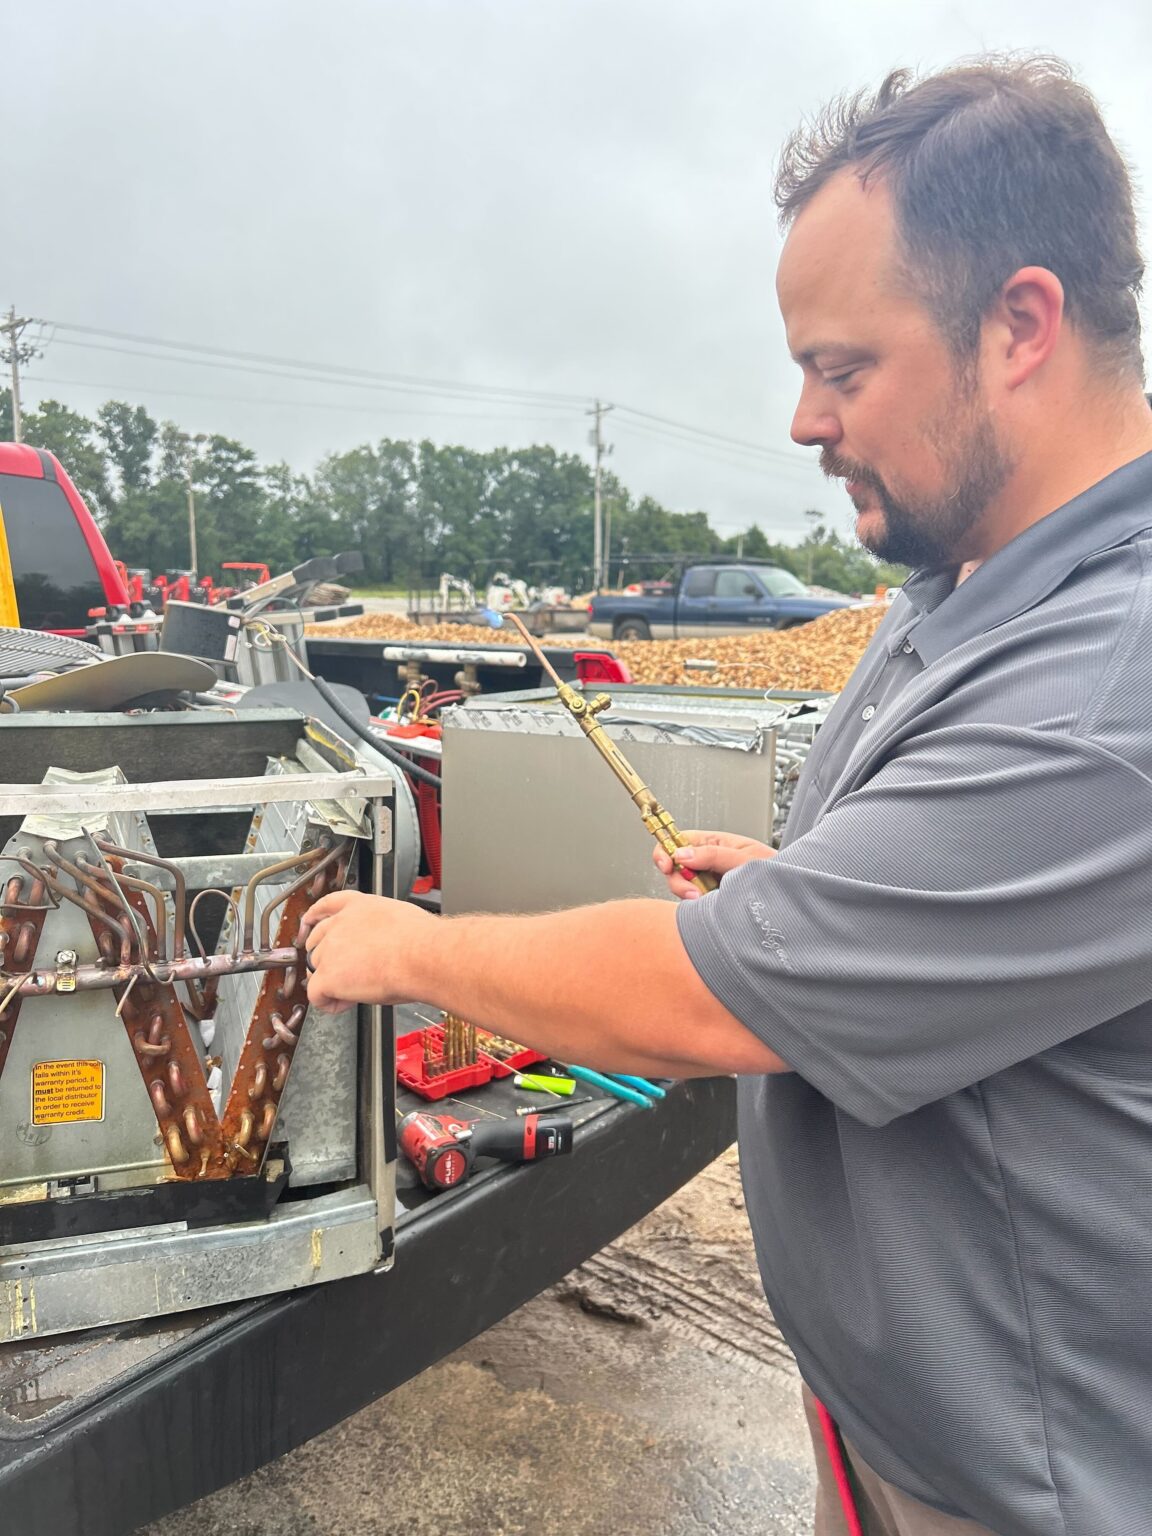
HVAC technicians use a three-step framework to handle refrigerant leak condenser unit repair: first diagnosing the exact leak location, then either sealing minor damage or replacing severely compromised coils.
Leak detection and diagnostic testing
Technicians start with visual inspections of your condenser coil to check for obvious signs of damage like corrosion, dents, or oil residue around potential leak points. These surface-level checks help identify external damage but don’t always reveal small breaches in the tubing.
Electronic leak detectors represent the most reliable diagnostic tool for pinpointing refrigerant escapes. These devices sense refrigerant molecules in the air and can locate leaks as small as 0.5 ounces per year. Some HVAC professionals also use ultraviolet dye that mixes with the refrigerant and glows under UV light, making leak sources visible.
Pressure testing confirms whether a leak exists and measures its severity. Your technician will pressurize the system with nitrogen and monitor pressure drops over time. A rapid pressure decline indicates a significant leak that likely requires coil replacement rather than repair.
Sealing small coil leaks and refrigerant recharge
Small leaks in accessible areas can often be sealed using brazing or specialized sealants. Brazing involves using high-temperature soldering to permanently close holes in copper tubing. This method works well for pinhole leaks and minor cracks in straight sections of coil tubing.
The HVAC coil repair cost for sealing small leaks typically ranges from $200 to $600, including labor and materials. After sealing the leak, your technician must evacuate any moisture from the system using a vacuum pump before adding refrigerant.
Refrigerant recharge follows leak repair to restore your system’s cooling capacity. The technician measures the exact amount of refrigerant needed based on your system’s specifications. Using the wrong refrigerant type or quantity will reduce efficiency and may damage your compressor.
Full condenser coil replacement when necessary
Multiple leaks, extensive corrosion, or leaks in hard-to-reach coil bends usually require complete air conditioner coil replacement. Repairing numerous small leaks costs more than installing a new coil and often fails within a year or two.
Replacement costs range from $900 to $2,500 depending on coil size, refrigerant type, and labor rates in your area. New coils come with warranties ranging from 5 to 12 years, providing better long-term value than repeated repairs on damaged units.
Your technician should evaluate your condenser unit’s age before recommending replacement. If your system exceeds 10 years old, replacing the entire outdoor unit may make more financial sense than installing a new coil in aging equipment.
Preventing future coil issues
Taking care of your AC system before problems start saves you money and extends the life of your equipment. Regular maintenance, cleanliness, and protection from the elements are the three main ways to prevent condenser coil leaks.
Routine HVAC maintenance and inspections
Schedule professional HVAC maintenance at least once per year, ideally before the cooling season starts. During these visits, technicians inspect your coils for early signs of wear, corrosion, or small leaks that you might miss on your own.
According to the U.S. EPA’s ENERGY STAR program, dirty coils reduce the system’s ability to cool your home and cause the system to run longer, increasing energy costs and reducing the life of the equipment, making annual coil inspections one of the most cost-effective maintenance steps a homeowner can take.
Between professional visits, you should change your air filters every 1-3 months. Clean filters improve airflow and reduce strain on your coils. You can also check your outdoor unit monthly for any visible damage or unusual sounds.
Keep records of all maintenance visits and repairs. This helps you track your system’s history and identify patterns if problems keep happening. A maintenance membership plan makes it easier to stay on schedule year after year.
Keeping outdoor units clean and debris-free
Your outdoor condenser unit needs clear space to work properly. Remove leaves, grass clippings, dirt, and other debris from around the unit regularly. Keep plants and bushes trimmed back at least two feet from all sides.
Clean the coil fins gently with a garden hose every few months during peak use. Spray from the inside out to push debris away from the coils. Never use a pressure washer, as it can bend the delicate fins and reduce efficiency.
Check for bent fins and straighten them carefully with a fin comb if needed. Even slightly bent fins restrict airflow and make your coils work harder.
Protecting the system from corrosion and weather exposure
Corrosion is one of the main causes of coil leaks. If you live near the ocean, industrial areas, or places with harsh weather, your coils face higher corrosion risks.
Professional-grade protective coatings add a barrier against moisture, salt, and chemicals. These coatings don’t interfere with heat transfer and can significantly extend coil life. Ask your HVAC technician about applying these during maintenance visits.
Consider installing a cover or awning over your outdoor unit to protect it from direct sun, rain, and snow. Make sure any cover allows proper airflow and doesn’t trap moisture.
Keep the area around your unit well-drained to prevent standing water, which accelerates corrosion. If you notice rust forming on the cabinet or coils, address it quickly before it spreads.
Conclusion
Condenser coil leaks require careful evaluation before deciding on repairs. You need to understand that repair success depends on the leak’s location, size, and your system’s age.
You should work with a licensed technician to inspect your system. They can locate the leak, test refrigerant levels, and assess whether repair makes financial sense. Multiple leaks or corrosion usually mean replacement is your better option.
Temporary fixes might buy you time, but they rarely solve the problem permanently. Your coil operates under high pressure, which makes patches vulnerable to failure.
If you choose repair, ask about protective coatings that prevent future corrosion. Regular maintenance helps catch small issues before they become major problems.
Your decision should balance immediate costs against long-term reliability. Sometimes spending more upfront saves money and frustration later.
Contact Kinty Jones today to have a licensed technician inspect your condenser coil and recommend the right repair or replacement solution for your system.